
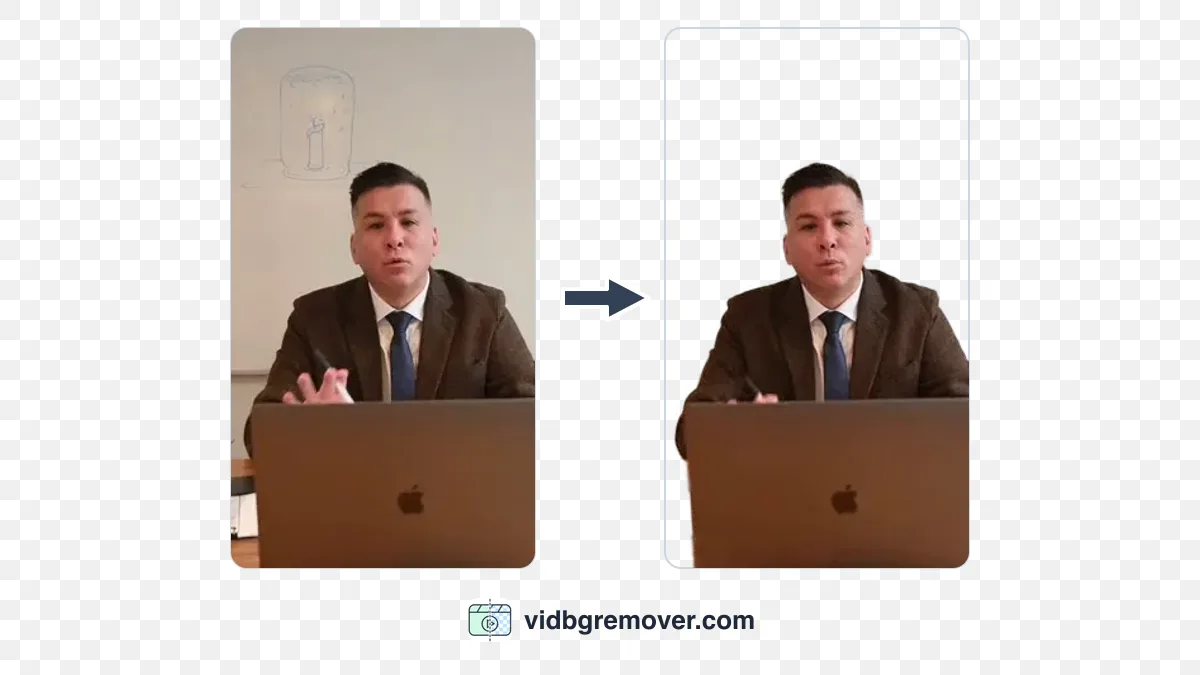
The video you have on hand is usually already an MP4: a product clip from a phone, a talking-head segment cut from a meeting recording, a final export from an editor. Removing its background doesn't require converting the file first. You can upload the MP4 directly to an AI video background remover and let the tool separate the subject from the scene.
The choice that matters more comes at the end of the process. If you want to keep the area around the subject transparent, export to a format that supports transparency, like WebM or MOV. If you need a normal video that's ready to share, add an image or color background and export the finished result as MP4.
The basic flow looks like this:
- Upload your MP4 video to an AI video background remover.
- Let the tool separate the subject from the original background.
- Choose a transparent output, or replace the background and export a new MP4.
The first two steps do the actual removal. The third decides whether you end up with a transparent asset or a finished video.
What You Need Before You Start
If you still have the original MP4, use it. Every time a video gets re-exported, sent through a messaging app, or downloaded from a social platform, it picks up compression, and the damage shows first around hair, hands, and other fine edges.
The current video workflow accepts MP4, MOV, and WebM files. It displays a 200MB file limit and supports videos up to 60 seconds in the main signed-in workflow, so check the uploader for the current limits before you begin if your file is large or unusually long.
Your MP4 will be easier to process when:
- The subject stays visible for most of the clip.
- The subject and background differ in color or brightness.
- The lighting doesn't change sharply from one frame to the next.
- The camera and subject aren't moving so fast that the outline blurs.
- Other people or objects don't cross in front of the main subject.
You don't need to shoot against green. Footage from a room, office, street, or studio can work. But if the video was deliberately shot against a green screen, the green screen background remover or video chroma key remover is usually a better fit, because those workflows key directly off the background color.
How to Remove a Background from an MP4 in 3 Steps
1. Upload the MP4 video
Open the video background remover and upload your MP4 file. Drag it into the upload area or choose it from your computer.

Before you process anything, watch enough of the clip to answer a few practical questions:
- Does the subject leave the frame?
- Do the hands, hair, or feet become hard to see?
- Does the background contain colors close to the subject's clothes or skin?
- Does another person pass behind or in front of the subject?
- Is there fast camera movement or a stretch of strong motion blur?
None of these means the result will fail. They tell you where to look when you review the processed video.
If you only need part of a longer recording, trim it first. A shorter clip is easier to review, and you won't spend processing time on footage you won't use.
2. Let the AI remove the background
Start the background-removal process and wait for the result. You don't need to draw a frame-by-frame mask around the subject.
When it finishes, play the whole clip instead of checking only the first frame. Automated removal tends to wobble in the same handful of places:
- Hair and other fine edges
- Fingers and thin objects
- Fast turns or arm movements
- Shadows and reflections
- Objects passing between the camera and the subject
- The first and last few frames of the clip
A still frame can look perfectly clean while the moving edge flickers during playback. If one section is unstable, trim it out, switch to a cleaner source file, or use a higher-quality processing option if one is available.

3. Choose what should replace the background
Once processing is done, decide whether you want to preserve transparency or produce a finished video. There are two common paths.

Keep the background transparent
Choose a transparent WebM when the clip is headed for a web page or a composition that supports alpha transparency.
Choose a transparent MOV when you're taking it into editing software that supports Apple ProRes 4444. It's a practical choice for post-production, though not every media player can preview it correctly.
Add a new background and export an MP4
If the video needs to play as a normal finished clip, use the video background changer. Pick a static image, upload your own JPEG, PNG, or WebP background, or go with a solid color. The tool removes the original background, places the subject over the new one, and exports the result as MP4.

This is the right path for a social post, product clip, presentation, or any file that should open in an ordinary player without alpha-channel support.
Can You Export a Transparent MP4?
Not in the standard MP4 workflow. MP4 plays almost everywhere, but here it's an opaque delivery format. Don't choose it when the area around your subject needs to stay transparent.
If you remove a background and then export as MP4, the transparent area has to be filled with something, whether that's a color or another image. And a black, green, or checkerboard-looking preview doesn't automatically mean a file contains transparency.
The rule of thumb:
| What you need | Format or workflow to choose |
|---|---|
| A normal video for social media or broad playback | Replace the background and export MP4 |
| A transparent video for a web page | Transparent WebM |
| A transparent clip for compatible editing software | Transparent MOV |
| A short animated sticker or chat asset | Make a transparent GIF or use a short transparent clip |
If your next step is editing, verify the format before downloading. Converting a transparent WebM or MOV to a standard MP4 too early will flatten the transparent area.
How to Choose a New Background for Your MP4
The background you pick affects how convincing the cutout looks.
Use a plain color for a quick social video
A white, black, green, or custom color background is easy to reuse, and it works well for announcements, simple product clips, and short posts where the subject should stay the focus.
Pick a color that contrasts with the subject. A person in a dark shirt can disappear into a black background; a pale product can lose its edge against white.
Use an image when the scene matters
An office, room, gradient, or product backdrop can make the video feel more finished than a flat color. Keep perspective and lighting in mind, though. A subject lit from the left will look pasted on over a background lit from the right, even when the mask is clean.
The current background changer works with a static image or color. If you need a moving video behind the subject, export the transparent result and composite it in an editor that supports alpha video.
Use the transparent result for later editing
Transparency is useful when you haven't chosen the final background yet. You can drop the subject over slides, a website section, a product scene, or another video without repeating the background-removal step.
It's also the better option when several versions of the same clip need different backgrounds. Keep the transparent master, then export the MP4 versions at the end.
How to Get a Cleaner Cutout from an MP4
The AI can separate a subject, but it can't recover detail the camera never captured. A few choices before uploading make a real difference.
Give the subject some separation
If the subject and background are nearly the same color, the edge gets harder to classify. When you can, move away from a similarly colored wall, and avoid busy patterns that overlap the outline of clothing or hair.
Use even lighting
A bright window behind the subject, flickering lights, or a face in deep shadow can make the outline shift from frame to frame. More light isn't always the fix. Consistent light beats a bright hotspot.
Keep fast movement under control
Motion blur erases the sharp boundary between subject and background. If you're recording new footage, add enough light and skip unnecessary rapid movement. If the MP4 already exists, trim the most blurred moments or at least inspect them before choosing the final export.
Upload the least-compressed version
Messaging apps resize videos and add compression artifacts around the subject. Upload the camera original or the highest-quality copy you have. A clean 1080p file is usually a better source than a heavily compressed 4K one.
Common Problems and Fixes
The exported MP4 still has a black background
That's expected if you exported a standard MP4, because MP4 is an opaque delivery format in this workflow. If you need transparency, download WebM or MOV instead. If you need MP4 for sharing, choose a new background and export the finished composite.
The transparent video looks black in Windows
The black preview usually comes from the player, not the file. Some Windows players don't render the alpha channel in a transparent MOV or WebM correctly.
For a more reliable test, open the file in an editor that supports the format and place it above a colored background layer. If the color shows through the empty parts of the clip, the transparency is working. A black preview in the default Windows player isn't enough evidence that the alpha channel is missing.
The edges look rough around hair or hands
Hair, fingers, shadows, and motion-blurred objects have less predictable edges than a product sitting still on a plain background. Try a higher-quality mode, a cleaner source, or a less distracting replacement background. If only a few frames are affected, manual cleanup in an editor is often faster than reprocessing the whole video.
The subject flickers during playback
Flickering means the mask is changing from frame to frame. Look for rapid movement, shifting shadows, colors that match the background, or an object crossing the subject. Trim the unstable section or improve the source clip, then export again.
Part of the subject disappears
The AI sometimes mistakes dark clothing, thin objects, or shadows for the original background. Check the preview around the missing area. A different source clip, stronger contrast, or a processing mode with more edge refinement can help.
The new background looks unnatural
The mask can be fine while the composite still feels wrong. Check whether the subject and background agree on light direction, scale, and perspective. A simpler background often looks more convincing than a detailed image that fights the original footage.
FAQ
Can I remove a background from an MP4 without converting it first?
Yes. MP4 is an accepted input format for the video background-removal workflow. Upload the file directly, then choose the output format based on what you want to do next.
Can I keep the file as MP4 after removing the background?
Yes, if you add a new background and export a finished composite. You can't keep a genuinely transparent area in a normal MP4 export. Use WebM or MOV for a transparent result.
Which is better for transparency, WebM or MOV?
WebM is the practical choice for web and browser-based use. MOV with ProRes 4444 is aimed at compatible editing software and larger post-production workflows. The receiving app matters as much as the file extension.
Can I replace the MP4 background with an image?
Yes. Use the video background changer to select a static image or a solid color, then export the new-background version as MP4. The tool accepts JPEG, PNG, and WebP background images.
Do I need a green screen to remove the background from an MP4?
No. AI background removal can work with ordinary footage. If your MP4 was recorded against a deliberate green screen, the green screen background remover or chroma key remover may be the more suitable workflow.
Why does my transparent MOV not open on Windows?
Some default Windows players don't support the ProRes 4444 codec or don't render its alpha channel. Try VLC to check whether the file opens at all. To verify transparency, import the MOV into an editor that supports ProRes 4444, such as Premiere Pro or DaVinci Resolve, and test it over a background layer instead of judging from a black preview.
Will removing the background reduce video quality?
It depends on the source file, processing mode, and export settings. Repeated compression, downscaling, and exporting to a lower-quality delivery format all remove detail. Keep the original MP4 and choose the final format at the end of the workflow.